About Me

Hello, My name is Vishal Joshi,SharePoint Expert since 2009 and I work as a Senior SharePoint Administrator for WT. Kindly have a look at the posts and leave a comment if a post helped you.

2011-09-16

Old image appears even after the user has uploaded the new image with the same name in the Picture Library


Issue:

User came with the issue that the old image appears even after the old image is deleted and a new image is uploaded into the Library. But he is able to view the updated image in the other user's machine

Resolution:

1. A copy of the file was store into the recycle bin of his machine.

2. Deleted the Old image from the Recycle bin.

3. Cleared the Cache.

4. Tried to Open the  Iamge and it Opens up correctly.

5. Done

Thanks


Settings to take care when only the user must edit the items which he has added in the Calendar

Issue:
User came with the requirement mentioned below:

She had created a Calendar List just as a Conference room Booking. She wanted that every user should be able to view the Date and Time for which the conference room is booked but the other users should not be able to Edit the items which she has created. Only the User who has booked the conference room in the calendar must edit his/her own item.

Resolution

1. Goto the Calendar List
2. Click on Settings--> List Settings
3. Click on Advanced Settings
4. Under Item level permissions, there are two options which specify which items users can read/edit
5. Select All Items under Read Access
6. Select Only their own under Edit Access
7. Done

Kindly reply to the post if the comment is useful.

Thanks


SharePoint 2007 Quick URL's for reference

Hello

Here are the list of Quick SharePoint 2007 URL's which can ease your task.

FunctionAdd to the URLNotes
Add Web Parts Pane?ToolPaneView=2Add to the end of the page URL; WILL ONLY WORK IF THE PAGE IS ALREADY CHECKED OUT
Create[area]/_layouts/spscreate.aspx 
Create/_layouts/create.aspx 
Create list in a different portal area/_layouts/new.aspx?
NewPageFilename=YourTemplateName.stp&
ListTemplate=100&
ListBaseType=0
When you save a template in a portal area and try to create a new list in a different portal area, the template will not show on the Create page. Use this URL to force it to show.
Documents and Lists/_layouts/viewlsts.aspx 
List Template Gallery/_catalogs/lt 
Manage Audiences/_layouts/Audience_Main.aspx 
Manage Cross Site Groups/_layouts/mygrps.aspx 
Manage List Template Gallery/_catalogs/lt/Forms/AllItems.aspx 
Manage My Alerts/_layouts/MySubs.aspx 
Manage People/_layouts/people.aspx 
Manage Site Collection Administrators/_layouts/mngsiteadmin.aspx 
Manage Site Collection Users/_layouts/siteusrs.aspxTo access you must be an admin on the server or a site collection admin for the site.
Manage Site Groups/_layouts/role.aspx 
Manage Site Template Gallery/_catalogs/wt/Forms/AllItems.aspx 
Manage Site Template Gallery/_catalogs/wt/Forms/Common.aspx 
Manage Sites and Workspaces/_layouts/mngsubwebs.aspx 
Manage User Alerts/_layouts/AlertsAdmin.aspx 
Manage User Alerts/_layouts/SiteSubs.aspx 
Manage User Permissions/_layouts/user.aspx 
Manage Web Part Gallery/_catalogs/wp/Forms/AllItems.aspx 
Master Page Gallery/_catalogs/masterpageAlso includes Page Layouts
Modify Navigation/_layouts/AreaNavigationSettings.aspx 
Recycle Bin/_layouts/AdminRecycleBin.aspx 
Save as site template/_layouts/savetmpl.aspx 
Site Column Gallery/_layouts/mngfield.aspx 
Site Content and Structure Manager/_layouts/sitemanager.aspx 
Site Content Types/_layouts/mngctype.aspx 
Site Settings/_layouts/settings.aspx 
Site Settings/_layouts/default.aspx 
Site Template Gallery/_catalogs/wt 
Site Theme/_layouts/themeweb.aspx 
Site usage details/_layouts/UsageDetails.aspx 
Site Usage Summary/_layouts/SpUsageWeb.aspx 
Site Usage Summary/_layouts/Usage.aspx 
Sites Registry/SiteDirectory/Lists/Sites/Summary.aspx 
Top-level Site Administration/_layouts/webadmin.aspx 
User Information/_layouts/userinfo.aspx 
Web Part Gallery/_catalogs/wp 
Web Part Page
Maintenance
?contents=1Add to the end of the page URL
Workflows/_layouts/wrkmng.aspx 


Kindly post your comment if you feel the post is helpful.

Thanks

The Server Block is not well formed

Issue:

An error occured whenever the user clicks on a particular Sub-Site "The Server Block is not well formed."

The Reason

While I'm sure a number of scenarios can create this situation. In my case, It was a matter of customization carried out on the Web-parts. Hence It was generating the Error message when the user tries to open the Subsite where the webpart resides.

Resolution:

Goto the SharePoint Settings page by adding _layouts/settings.aspx at the end of the SharePoint Site URL For Ex: https://testserver/sites/testdemo/testsubsite/_layouts/settings.aspx

The following URL would take you to the Site Settings page

Finally perform the simple steps mentioned below:-

1. Goto Look and Feel
2. Reset  to Site Definition
3. Select Reset Specific Page to Site Definition Version
4. Provide the Local url of the page i.e. https://testserver/sites/testdemo/testsubsite/default.aspx
5. Click on Reset
6. Done

By Resetting the Site Deinition, It would restore the Site with default settings and close all the Webparts and then the user was able to open the Site.

Thanks


2011-09-15

Windows SharePoint Services Folders are read only in Outlook

Issue:
User came with the issue that he was recieving the Erro message "Windows SharePoint Services Folders are read only in Outlook" whenenver he tried to Edit the SharePoint Calendar from MS Outlook

The Reason
User had Outlook 2003 installed on his system and after researching, I found out that the Functionality the client is looking for is available only with Outlook 2007. With Outlook 2003 users are having read only permissions, it is a limitation of the previous product.

Resolution:
Asked the Client to upgrade to the Outlook 2007. Refer  to the Forum Article
http://social.technet.microsoft.com/Forums/en-US/SharePointGeneral/thread/3e21fcf1-cf18-4bea-9ao3-635dcd33bb3d/

Kindly comment if the post was helpful.

Thanks

2011-03-16

File Conversion in Process, Converter Failed To Save File

On some machines, when a user opens an Excel file from SharePoint and checks out for edit and -does not- use the local drafts folder, yousee a dialog with "File Conversion In Progress", then "ConverterFailed To Save File" message, but the file is checked out to the user and will not open in the Excel. It never opens the application and I'm returned to the document library. If I already have the application it doesn't generate the error.

The fix is to do the following:

- Open Word
- Click the Office button (Top-left in the window)
- Click Word Options
- Click Resources
- Click the Diagnose button
- Click through the wizard until it’s finished
- Close all browser windows

That’s fixed all of our issues…

Access Denied when attempting to create a new page

When attempting to create a page by clicking Site Actions Create Page, the user immediatly receives an Access Denied. This occurs even if the user is a member of the Site Owners group with Full Control.

ERROR MESSAGE: Access Denied

CAUSE:
===========
The access denied was a result of the user not being a part of the Style Resource Readers group. According to technet, this group allows a user to read the Master Page Gallery and Restricted Read the Style Library. By default, this group contains only the NT AUTHORITY\Authenticated Users group. This will allow all users who have authenticated to the site to read the Master Page gallery and Style Library.

RESOLUTION:
====================
1) Open the site you are having issues with
2) Click Site Actions Site Settings
3) In the Users and Permissions section, click People and Groups
4) Click Groups
5) Click Style Resource Readers
6) Click New Add User
7) In the Add Users section, click the Add all authenticated users link
8) Click OK
I hope the above information will helps you to resolve this issue !! Thanks !!

How to Configure the Site Actions Menu on child site the same as Parent Site

Hi

In SharePoint Server 2007, For Parent Site actions Menu lot of options are getting displayed , but in the case of child Site under Site actions menu You are able to see onle 3 options (create, Edit page, site settings ) why ??

Here is the resolution for this :-

On the child site go to Site Action > Site Settings > Site Features and activate Office SharePoint Server Publishing feature which will give you all the options which are on parent site.

Configuring Advanced Search in SharePoint 2007

  1. Go to the central administration -> Shared Services
  1. Under the Search Menu, click on Search Settings.
  2. In the Configure Search Settings page, click on Metadata Property Mappings.
  1. In the Metadata Property Mappings page, click on New Managed Property
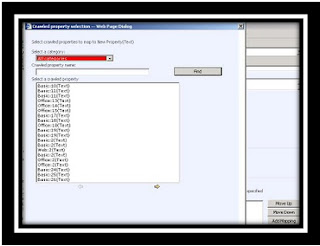
  1. Enter the Property Name and add the crawled properties that you want to add by clicking on the Add mappings button.
  1. Click OK. Once you have created the new custom managed property,
  2. Go to the Advanced Search page.
    • Click on Site Settings and then on "Edit Page"
    • Click on Edit Menu of the Webpart and then Select "Modify Shared Web part"
In the Advanced Search Box Pane, click on the Properties Menu and then select the content in the Properties Text Box. In order that your Managed Properties appears in the Properties lists, you need to make changes in the XML file content.
The XML File in Properties has the following structure:
  • Find the string:
<PropertyDef Name="ModifiedBy" DataType="text"
            DisplayName="Last Modified By"/>
  • Add the following String below it:
<PropertyDef Name="MyProperty" DataType="text" DisplayName="MyProperty"/>
MyProperty denotes the managed property that was created in Search Settings in the Shared Services.
  • Find the ResultType node:
<ResultType DisplayName="All Results" Name="default">
  • Add the following string below this:
<PropertyRef Name="MyProperty" />
  • Now you can click on Apply and OK to close the pane.
  • The property "MyProperty" will appear in the Property list box when All Results is selected.
8.    Perform a Full Crawl.

How to Hide the default Column in the Site Content Type?

Hi All
Title column is default column in list. You can't delete it but rename column name or the best way to get rid of it is to hide it .
To hide Title column follow below steps
1.    Go to Your list settings on which you want to hide/remove title column.
2.    Go to advanced settings of that list.
3.    Click on yes at very first option. Allow management of content types.
4.    Once you do this, one more setting panel becomes visible in advanced settings options. 
5.    Now click on that Item content Type.
6.    As you can see here you will find all columns are listed along with Title column.
7.    Click on that Title column. 
8.    Select the last radio button which is Hidden.
9.    Save all settings and then go back to list and click on new Item and see... now Title column is no more there....
Make sure that you also remove all reference of Title column from views because it is hidden now but still it will be there in views.

2011-03-15

Authenticated Users get Access is Denied when Browsing to Site- 403 Forbidden

When NT Authority\Authenticated users were added to a windows sharepoint services 3.0 site, users other than the users directly permissioned to site, or Site Collection Admins would receive a 403 Forbidden error when they woudl try to browse to the Default.aspx page.

ULS Logs would show:
============================================================
Access Denied for /default.aspx.
StackTrace: Microsoft.SharePoint.Utilities.SPUtility:Void
HandleAccessDenied(System.Exception), Microsoft.SharePoint.SPGlobal:Void
HandleUnauthorizedAccessException(System.UnauthorizedAccessException),
Microsoft.SharePoint.SPWeb:System.String GetWebPartPageContent(System.Uri,
Microsoft.SharePoint.WebPartPages.PageView, System.Web.HttpContext, Boolean,
Boolean, Boolean, Boolean, Boolean ByRef, Byte ByRef, System.String ByRef,
System.Guid ByRef, Int64 ByRef, System.Guid ByRef, UInt32 ByRef, System.String
ByRef, Byte ByRef, System.Object ByRef, UInt32 ByRef, System.Object ByRef,
Microsoft.SharePoint.SPWebPartCollectionInitialState ByRef, System.Object ByRef,
System.String ByRef, Boolean ByRef, System.Guid ByRef),
Microsoft.SharePoint.ApplicationRuntime.SPRequestModuleData:System.String
FetchWebPartPageInformationForInit(System.Web.HttpContext,
Microsoft.SharePoint.SPWeb, Boolean, System.String, Boolean, Boolean ByRef, Byte
ByRef, System.Guid ByRef, UInt32 ByRef, System.String ByRef,
Microsoft.SharePoint.SPFileLevel ByRef, System.String ByRef, System.String ByRef,
System.String ByRef, System.String ByRef, System.Guid ByRef, System.Object ByRef,
Microsoft.SharePoint.SPWebPartCollectionInitialState ByRef, System.String ByRef,
System.String ByRef, System.Object ByRef, Boolean ByRef, System.Guid ByRef, Int64
ByRef), Microsoft.SharePoint.ApplicationRuntime.SPRequestModuleData:Void
GetFileForRequest(System.Web.HttpContext, Microsoft.SharePoint.SPWeb, Boolean,
System.String), Microsoft.SharePoint.ApplicationRuntime.SPRequestModule:Void
InitContextWeb(System.Web.HttpContext, Microsoft.SharePoint.SPWeb),
Microsoft.SharePoint.WebControls.SPControl:Microsoft.SharePoint.SPWeb
SPWebEnsureSPControl(System.Web.HttpContext),
Microsoft.SharePoint.WebControls.SPControl:Microsoft.SharePoint.SPWeb
GetContextWeb(System.Web.HttpContext),
Microsoft.SharePoint.ApplicationRuntime.SPRequestModule:Void
PostResolveRequestCacheHandler(System.Object, System.EventArgs),
System.Web.HttpApplication+SyncEventExecutionStep:Void
System.Web.HttpApplication.IExecutionStep.Execute(),
System.Web.HttpApplication:System.Exception ExecuteStep(IExecutionStep, Boolean
ByRef), System.Web.HttpApplication+ApplicationStepManager:Void
ResumeSteps(System.Exception), System.Web.HttpApplication:System.IAsyncResult
System.Web.IHttpAsyncHandler.BeginProcessRequest(System.Web.HttpContext,
System.AsyncCallback, System.Object), System.Web.HttpRuntime:Void
ProcessRequestInternal(System.Web.HttpWorkerRequest), System.Web.HttpRuntime:Void
ProcessRequestNoDemand(System.Web.HttpWorkerRequest),
System.Web.Hosting.ISAPIRuntime:Int32 ProcessRequest(IntPtr, Int32),
==================================================================

after detailed analysis and debug of the w3wp process, we found two columns with non standard settings in the content database. In the AllList table the columns called tp_readsecurity and tp_writesecurity, for the “User Information List” have the values set to 2 & 4 respectively. The default value for both columns is 1.

Tp_readsecurity

Value="1">read all items
Value="2">read only my items
Value="4">read none


Tp_writesecurity

Value="1”>write all items
Value="2">write only my items
Value="4">write none

The value 2 for tp_readsecurity will only allow a user to read their own items. So reading the items does not occur because it is trying to read the items in the “user Information list” that are not their own. The value 4 for tp_writesecurity does not allow write to this list so you will not be able to add users. Since they have not or cannot be added into the list, there was an exception being thrown and this is the reason for the 403 Forbidden.

RESOLUTION/WORKAROUND:
===========================
1. Open the site you are having trouble with, but make sure you open the site
with site collection admin/owner rights.
2. Browse to the URL:
http://portal/sites/site/_layouts/advsetng.aspx?list={GUID}
3. This List ID will vary.
4. You can also get to this list by Browsing to the root of your site, Site
Actions> Site Settings> Advanced Permissions> Click on the All People link
in qiuck launch> Then select List Settings, then Advanced Settings
5. This method will also get you to the above URL and probably easier than
having to poke thru the DB to find the GUID of that list.
6. Change the Read Access Value to “All Items”
7. Change the Edit Access to “All Items”
7. This will modify those values in the database back to 1 and 1
8. Authenticated Users should now be able to access the site.
I hope the above information will helps you to resolve this issue !! Thanks !!!

How can I get PDF File Type icon for particular document library in sharepoint 2007

To get the DocumentType Icons in the Grid View, you can go to the Views and Check the File Type Check box as suggested by Chirag.
But in case if you want to get the PDF File Type Icon you need to follow the link or the steps mentioned below
Steps
1.    Download an appropriate icon for pdf document types. The PDF Icon is available at the following link
2.   Save the .gif file to TEMPLATE\IMAGES directory. (DEFAULT: C:\Program Files\Common Files\Microsoft Shared\web server extensions\12\template\images)
3.   Open the file docicon.xml. (DEFAULT: C:\Program Files\Common Files\Microsoft Shared\web server extensions\12\template\xml\docicon.xml)
4.   Add a new Mapping element to the ByExtension element.
<Mapping Key="pdf" Value="pdficon_small.gif" />
NOTE: Be sure to change pdficon_small.gif to whatever image you downloaded to represent pdf documents.
5.    Save the edited docicon.xml file

6.    Restart IIS (iisreset /noforce).
You should now see the PDF icons for all PDF documents in the portal, including search results.

2011-03-10

How to change the Account used to Manage SSP?

Run following command which will update user credentials in search services.

1.    stsadm.exe -o osearch -farmserviceaccount DomainName\UserName -farmservicepassword NewPassword

2.    stsadm.exe -o editssp -title SharedServicesProviderName -ssplogin DomainName\UserName -ssppassword NewPassword

2011-03-09

Server Farm Configuration Not Complete

The warning "Server Farm Configuration not Complete" is displayed on Central Administration pages until you complete three tasks that are required prior to deploying any sites. The Administrator Tasks list displays the tasks that need to be completed, as follows:
  • Add servers to the farm
  • Assign required services to each server
  • Create a Shared Services Provider (SSP)
Add servers to the farm
Before you can add servers to the farm, you must install and configure Office SharePoint Server 2007 on all Web servers and any index servers to be added to the farm. After installing Office SharePoint Server 2007, you then run the SharePoint Products and Technologies Configuration Wizard in order to join the server to the farm.

When you have completed this task, edit the task in the Administrator Tasks list, and set the Status to Completed.

Assign the required services to each server in the server farm
  1. On the top link bar of the Central Administration site, click Operations.
  2. On the Operations page, in the Topology and Services section, click Services on server.
  3. On the Services on Server page, if the Server list box does not show the name of the server you want to configure, click the drop-down list and then click Change Server. On the Select Server page, click the name of the server you want to configure. The selected server will be displayed on the Services on Server page.
  4. Select the server role for the server you are configuring. The list of available services and the service status will be displayed in the table. The table indicates which services are required, and provides a link to start any services that are currently stopped.
  5. Start the required services, and any additional services you want to use with the server you specified.
  6. Repeat steps 3 through 5 for each server in your server farm.
When you have completed this task, edit the task in the Administrator Tasks list, and set the Status to Completed.

Create a Shared Services Provider (SSP)
After adding servers to your farm and assigning the required services to each server, you must create a Shared Services Provider (SSP). An SSP provides a common set of services and service data to a logical grouping of Web applications and their associated sites.

When you have completed this task, edit the task in the Administrator Tasks list, and set the Status to Completed.

Export and Import a SharePoint Subsite

In MOSS, there are two new STSADM commands - import and export.The basic procedure to restore the subsite was to STSADM export the site to a file and then STSADM import it to new site collection's sub site.
 
Note:
The toplevel site is http://sspserver1:4500/ and the subsite is http://sspserver1:4500/Wiki/
 
Export subsite
stsadm -o export -url http://sspserver1:4500/Wiki/  -filename d:\DatabaseBackup\Wiki.bak -includeusersecurity
-versions 4
 
Import subsite
stsadm -o import -url http://sspserver2:4500/Wiki/  -filename d:\DatabaseBackup\Wiki.bak -includeusersecurity
 
A couple of things to note:

The -includeusersecurity switch ensures that all the columns such as modifed by, created by are maintained.
The -versions 4 switch will ensure that all versions of list items/documents are exported.
 
 
You must import/export to sites that share the same template. So a team site can only be exported and imported into another team site. You will know you are trying to import into non matching templates if you get the following error: "The exported site is based on the template STS#1 but the destination site is based on the template STS#0" This means that a site based on the blank template is trying to be imported into a site based on the team template.To my knowledge there is no easy way of changing a sites templates.